
Cheap Terrarium Supplies: Where to Source Them Locally

The cheapest terrarium supplies are mostly things you already own or can find nearby: a clear glass jar from the kitchen, washed gravel from an aquarium shop, a soilless mix from a plant nursery, and small plants bought as cuttings or nursery pots instead of a kit. Spend only where cheap goes wrong: the growing mix must be clean and soilless, the gravel must be washed, and outdoor bark or garden soil should stay outside.
That is the whole strategy in one paragraph. The rest of this guide goes component by component, because “cheap” means something different for a jar than it does for the material your plants will root in.
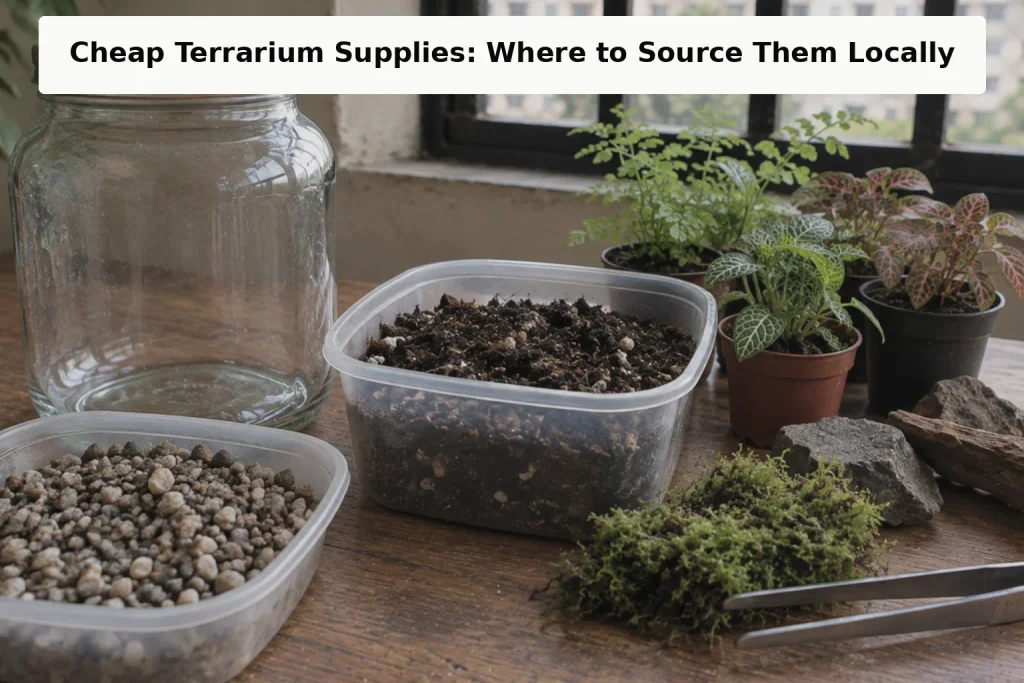
“In my own builds, I’ve found that keeping the budget low works best when I spend almost nothing on the parts that are easy to reuse and save the money for the few things that actually affect plant health. A clear food jar from home, washed gravel, simple household tools and cuttings can do the job perfectly well, while I would rather pay for clean soilless mix and healthy, appropriately sized plants than gamble on garden soil or random outdoor material. One habit that has saved me money is choosing the container first and buying everything else to fit it, because that stops me from ending up with oversized bags, unnecessary layers, or plants that were never going to fit the jar properly.”
Why kits cost more than the parts
A terrarium kit bundles a container, a few layers of material, some decoration and sometimes plants into one box. You pay for the convenience of not having to think, plus packaging and shipping for things that are heavy (gravel, glass) and easy to find locally.
Almost every item in a kit has a local, often free, substitute. The exceptions are the items where “free” carries a real risk to the build. So the useful question is not “where is the cheapest kit?” but “which parts can I reuse, which should I buy loose, and which should I never take for free?”
The budget sourcing map: component by component
Here is how the parts of a closed or open terrarium break down by where you can get them without ordering online.
| Component | Cheapest local source | What to check before using it |
|---|---|---|
| Container | Your own kitchen, secondhand or thrift shops | Clear, untinted glass; a mouth wide enough for your hand or tools |
| Lid | The jar’s own lid, a cork, a glass plate, or plastic wrap | Sits evenly; no rusting metal face over a wet build |
| Drainage layer (optional) | Aquarium shop, garden center | Washed and clean, not dusty builders’ gravel |
| Growing mix | Plant nursery | Soilless and clean, not garden soil |
| Plants | Nursery pots, cuttings from friends | Small, slow, humidity-tolerant species |
| Moss or ground cover | Nursery, or heat-treated indoor bark | Not outdoor landscape bark |
| Hardscape (stone, wood) | Found stone you can scrub; aquarium shop | Stone that will not crumble; wood that survives constant damp |
| Tools | Chopsticks, a long spoon, tongs, a spray bottle | Clean, and long enough to reach the bottom |
Each row is expanded below.
Containers: the part that should cost nothing
The container is where most people overspend, and it is the easiest part to get free.
Mississippi State University Extension’s guide How to Design a Closed-System Terrarium (Publication 3253, read September 25, 2026) says “any clear glass or plastic container is suitable for use as a terrarium,” and gives fish bowls, canning jars and antique milk bottles as examples. The same publication warns that the container “should not be cloudy or tinted, as this would restrict light and limit plant growth.”
That gives you a simple filter for anything in your kitchen or a secondhand shop:
- Clear, not tinted. Green, amber or frosted glass looks good and starves the plants of light.
- A usable mouth. A narrow neck is workable but slow; a wide mouth is the easier choice for a first build.
- Smooth walls. Heavy embossing and printed labels block light where your plants sit.
- An intact rim. A chipped rim will not hold a lid evenly and is a cut hazard every time you reach in.
Pickle jars, sauce jars, large storage jars and old fish bowls often pass this filter. For a fuller list of what counts as a container, see what to build your terrarium in, and for the specific question of whether a reused food jar will hold a closed ecosystem, see which recycled jars seal well enough.
Secondhand shops and household clear-outs are the other free source. Glass vases, storage jars and old tanks turn up regularly, and the same clear-and-untinted rule applies.
Lids: improvise, but check the fit
A closed terrarium needs a cover that holds water vapor in. It does not need a factory seal. The jar’s own lid usually works. If the jar has lost its lid, a cork, a small glass plate laid over the mouth, or plastic wrap can all cover a build.
Two cautions. Metal lids can rust once they sit over constant condensation, so check the inside face. And a lid that rocks on an uneven rim lets the build dry out faster than a closed jar should, which shows up as a jar that rarely fogs.
The growing mix: the one place not to cut corners
This is where the budget logic reverses. A free bucket of garden soil is the most expensive “saving” in the hobby, because it brings in whatever lives in it and it tends to compact inside a sealed jar.
The Mississippi State guide is direct on this: “Only clean, washed gravel and sterile, soilless potting mix should be used.” A local plant nursery is usually the most convenient source of a soilless mix, and a small jar build needs only a small amount, so there is no reason to buy a large bag.
If you want to understand why soil fails and what a terrarium mix is made of, why soil fails as terrarium substrate covers the components. The budget point is simply this: buy the mix, reuse the jar.
Gravel and drainage: aquarium shops beat construction sites
If you use a drainage layer, an aquarium shop is a practical local option, because aquarium gravel is sold to sit in water. Builders’ gravel and sand are cheap but dusty and full of fine particles, and you would have to wash them thoroughly before they met the Mississippi State standard of “clean, washed gravel.”
Whether you need a drainage layer at all is a separate question. Many small closed builds skip it, so treat it as an optional purchase rather than a required one.
Charcoal: optional, and easy to overbuy
Kits often include activated charcoal. The Mississippi State publication describes horticultural-grade charcoal as “pure carbon chips, about one-fourth of an inch long.” If you decide to use charcoal, look for a product labeled horticultural or activated, not barbecue charcoal, which is sold for burning rather than growing.
Charcoal is also one of the most debated layers in the hobby, and many builds run without it. A budget build can leave it out and add it later if you decide you want it.
Plants: buy small, buy loose, or trade cuttings
Plants are the one category where spending a little is better than spending nothing, because a healthy nursery plant is a known quantity, while something pulled from outside is not. The budget moves are:
- Buy the smallest pot size. Terrarium plants need to stay small anyway, and small pots cost less.
- One pot, several plants. Many ground-cover and trailing plants can be divided or trimmed into more than one piece.
- Trade cuttings. Many common trailing houseplants root from cuttings, and a friend’s overgrown plant costs you nothing.
- Be wary of “decorative” kit plants. A plant chosen for how it looks on the day of sale is not always one that tolerates life in a humid jar.
The choice of species matters more than the price. A cheap plant that hates humidity is money wasted, so check the humidity and size needs of anything you buy before it goes into a sealed build.
Moss, bark and ground cover
Moss is the item most often bought as a premium extra. There are cheaper paths:
- A nursery ground cover plant instead of moss, for a green carpet.
- Heat-treated bark for indoor plants. Mississippi State says it “offers a nice alternative to moss or can be combined with it for pattern and texture.”
What the same guide warns against is the free option most people reach for: “Avoid using bark intended for outdoor landscapes, as it may harbor pathogens that could introduce disease into the terrarium.” Wild moss from walls and drains raises a similar problem: it is free, but it can carry pests, and collecting it comes with its own ethical and legal questions. It is a topic of its own rather than a budget tip.
Hardscape: found stone, careful wood
Stones and wood give a build structure, and both can be sourced cheaply.
Stone. Stones you find are usable if they are solid, will not crumble, and can be scrubbed clean. Rinse off soil and anything you cannot identify. Aquarium shops also sell rock intended to sit in water.
Wood. This is where free materials often fail. Branches from outside can rot or grow mold in constant humidity. The detail on which wood and stone hold up is in terrarium hardscape: wood and stone that won’t rot.
Tools: the kitchen drawer is the tool kit
Terrarium tool sets are one of the easiest purchases to skip. A tool needs to reach the bottom of the container, place things precisely, and press the mix down. Household substitutes cover all of that:
- Chopsticks for placing plants and making planting holes.
- A long spoon for moving mix into place.
- Kitchen tongs or long tweezers for placing stones and moss.
- A cork or bottle cap on the end of a stick for pressing the mix down.
- A clean spray bottle for watering and rinsing glass.
- A paper towel wrapped on a stick for wiping the inside of the glass.
Wash anything that has been used with food or cleaning chemicals before it goes near the build.
What not to take for free
Budget sourcing works because most of a terrarium is inert: glass, stone, gravel. The risk comes from free things that are alive or were recently outdoors. Leave these out, even though they cost nothing:
- Garden soil. Not sterile and not soilless.
- Outdoor landscape bark. Mississippi State warns it may carry pathogens.
- Unwashed builders’ gravel or sand. Too much fine dust.
- Branches and wood from outside. Prone to rot and mold in a humid jar.
- Wild moss, unprepared. Pests and legal questions come with it.
- Tinted or cloudy glass. Free, but it limits light for the life of the build.
A budget buying order
If you are starting from nothing, this order keeps spending low:
- Find the container first, at home or secondhand. It decides the size of everything else.
- Buy a small amount of soilless mix from a nursery, sized to the container.
- Choose two or three small plants that suit a humid jar, in the smallest pots available.
- Add optional layers only if you want them: gravel, charcoal, moss.
- Use kitchen tools until you know whether you enjoy the hobby enough to buy dedicated ones.
Prices vary by city, shop and season, so compare a couple of local sellers before buying loose materials. What stays constant is the principle: reuse everything inert, and buy the few things that must be clean.
Frequently asked questions
What is the cheapest way to make a terrarium?
Reuse a clear glass jar from home, buy a small amount of soilless potting mix and one or two small plants from a local nursery, and use chopsticks and a spoon as tools. Skip optional extras such as charcoal and decorative moss until the basic build is working.
Can I use soil from my garden in a terrarium?
It is not recommended. Mississippi State University Extension advises using only “sterile, soilless potting mix.” Garden soil can carry pests and disease organisms into a closed container.
Are terrarium kits worth it?
A kit saves time, not money. Most of what is in the box, such as the container, gravel and tools, has a local or household substitute. A kit makes the most sense if you cannot find a suitable container or growing mix locally.
Where can I get cheap terrarium gravel?
Aquarium shops are a practical local source, because aquarium gravel is sold to sit in water. Builders’ gravel costs less but needs thorough washing to remove fine dust before it goes into a jar.
Can I use a plastic container to save money?
Yes. Mississippi State University Extension says clear plastic containers are suitable. Plastic scratches more easily than glass, and a scratched wall turns cloudy over time, so glass is the better choice when you have one.